How to: Testing your Survey
Introduction
A well-designed survey can garner better results and create a positive engagement with your brand. A key step in the design of any survey is the testing process. Through this process the format and functionality can be tested and refined, ensuring the best possible experience for survey respondents.
Survey formatting
We will start with the visual formatting of the survey.
- In the survey editor, click on the [Test] button. This will open a new browser window displaying an All sections view of your survey. This view will display the whole survey on one page for the purposes of easy viewing. It is important to note that if you have used page breaks or section headers this view will appear differently to how the survey will appear to a respondent.
You may use this as a tool to review your survey once you have written your questions OR you may wish to leave this window open whilst writing your questions, checking formatting as you go. In this case, please click refresh each time you make a save.
- With the Test mode window open, scroll through your survey. This is the most effective way to take note of any formatting issues such as an ‘orphaned’ answer choice where one answer sits alone on a new row or unexpected text wrapping. You may also want to keep any design goals you might have in mind.
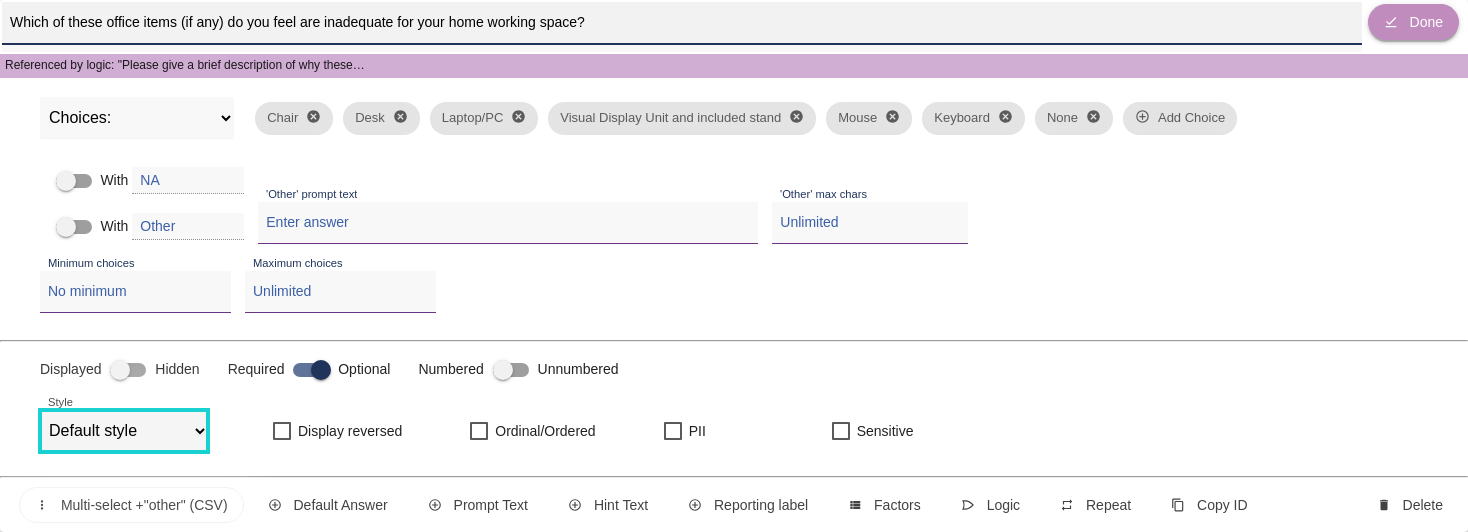
- Below is an example of a question with formatting that could be improved. Due to the length of text and the size of the answer boxes, the “Visual Display Unit and included stand” answer has undesirable text wrapping.

In the Question Editor on the Edit Survey page, you will find a Style dropdown, enabling you to choose from various display formats for your questions and answers.
This question is currently using the Default style, in this instance the 2 answer columns style is more appropriate, resulting in a more pleasing format.
For more information on the formatting styles available in SurveyOptic, please refer to the 'Survey Editor' explainer document.
Survey functionality and flow
Once your survey has the desired formatting, the next step is to test the functionality and flow. The best way to test this is by stepping through the survey as a respondent would.
- With the Test mode window open, click the Section view option. In this view you can step through the survey as a respondent would and submit a response. Any responses the survey receives will be flagged as test responses and can be easily removed later.
- Work through the survey, answering questions just as a respondent would. Whilst answering, check that any Logic and Substitutions are functioning as expected. Click the New button to start new responses and Test different flows.
- Take note of any elements which are not functioning as desired and re-visit the Survey editor to amend. For further information on survey functionality, please refer to the 'Survey Editor' document.
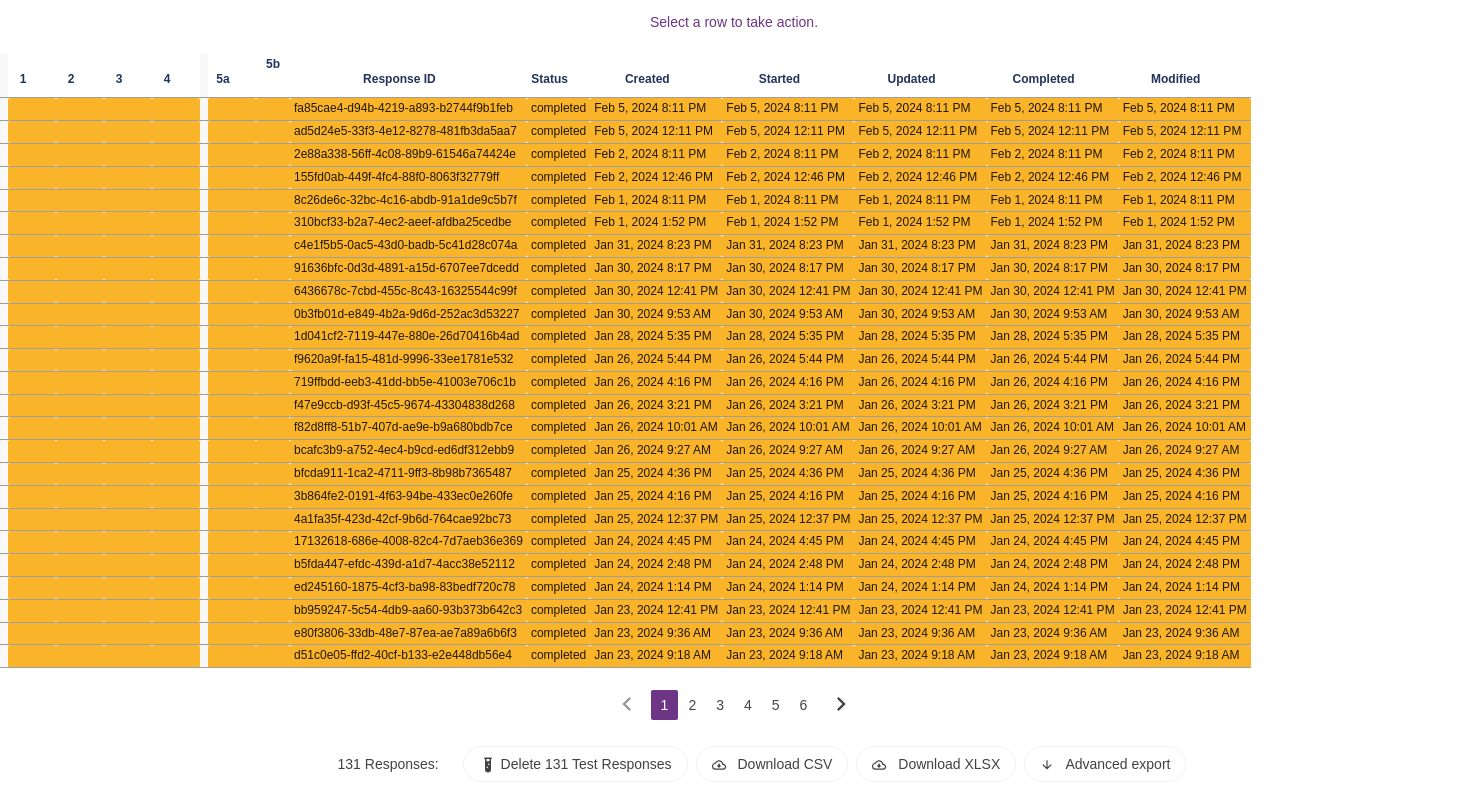
Test responses are also included in reporting, enabling viewing and testing of the survey reporting. This can be used to check that your survey design will report data in the ways you require. - Once the survey is functioning as desired, go to the responses page of your survey. You will find your test
responses are there, highlighted in yellow.

These responses can be easily removed by using the [Delete x Test Responses] button. - If you are conducting an email invite survey, it is also good practise to test the email functionality. Please refer to the 'How To – Email Invite Survey' for detail on how to test.
Feedback from colleagues
Secure links
A secure test link can be visited and shared using the [Test] button in the survey editor. This can be accessed by other SurveyOptic full users and is ideal for sharing with your close team. The secure test link is available whether your survey is Draft or Published.
Public links
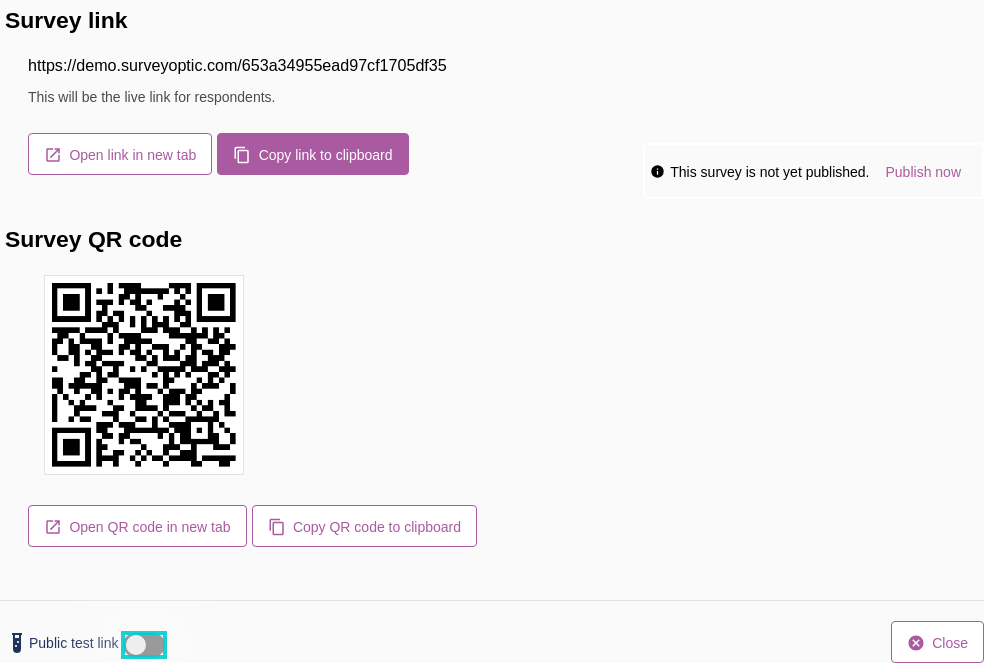
A Public test link can be found using the [Share] button in the Edit Survey page or the Surveys page. These links offer the same functionality as the secure links but do not require a SurveyOptic full user account. These links are ideal for sharing with your wider team. Link disabling and generating give survey builders control over who is testing the survey and how long for. The public test link is only available whilst the survey is in Draft.

Live Pilot
Before publishing your survey, you may wish to conduct a live pilot with 'real-life' users. In this instance the survey is generally shared beyond the teams involved with the survey. For an employee engagement survey for example, a piot would generally be conducted with a small group of employees whom the survey is targeted at. These testers often give a different perspective to others involved in the project. A live pilot is conducted in a manner as close to live as possible, for this we use Test mode.
- For conducting a live pilot, select Test mode in the Advanced tab of the survey editor.

Whilst in test mode, this will be indicated on the survey tile. - The survey needs to be both 'published' and 'open'. A survey can be published either by clicking the [Publish] button in the survey editor, or by clicking the [Publish] button on the survey tile in the surveys page.
The open date can be set in the survey editor or the suvrey tile using the open date picker. The open date will need to be set to the earliest required date for testing, in most cases this will be today’s date. - Using the [Share] button on the surveys page, copy the Survey link and share with your pilot group for testing.
- If test mode was not used, you will have responses that are not highlighted. To delete these responses, click on a response to open the “actions” menu above the responses table. Select [Delete permanently] button to delete the response. Repeat the process for any undesired responses.

- When ready to go live, return to the Advanced tab in the survey editor. Uncheck the 'test mode' button and the 'multiple responses per person' button if used.

You may also wish to amend your Open date. When ready, the Survey link can be shared for your live survey.